I have a relative new camera – a Nikon D7500 from 2018, with lots of features and settings. This camera can do pretty much anything my skill-level lets me, but not if I don’t know how to handle it. You might say that the gear is not important when photographing, but if the camera works against you, it most certainly is. I decided to get to know my camera. In order to do so, I ordered a book on Amazon, spesifically for my camera, and I have read almost half of it. The D7500 is so powerfull and full of buttons and settings that it is quite overwhelming. Some of the setttings, I set once and forget about it. Some features, I use all the time. These are settings for shutter speed, aperture, ISO, auto focus mode and white balance.
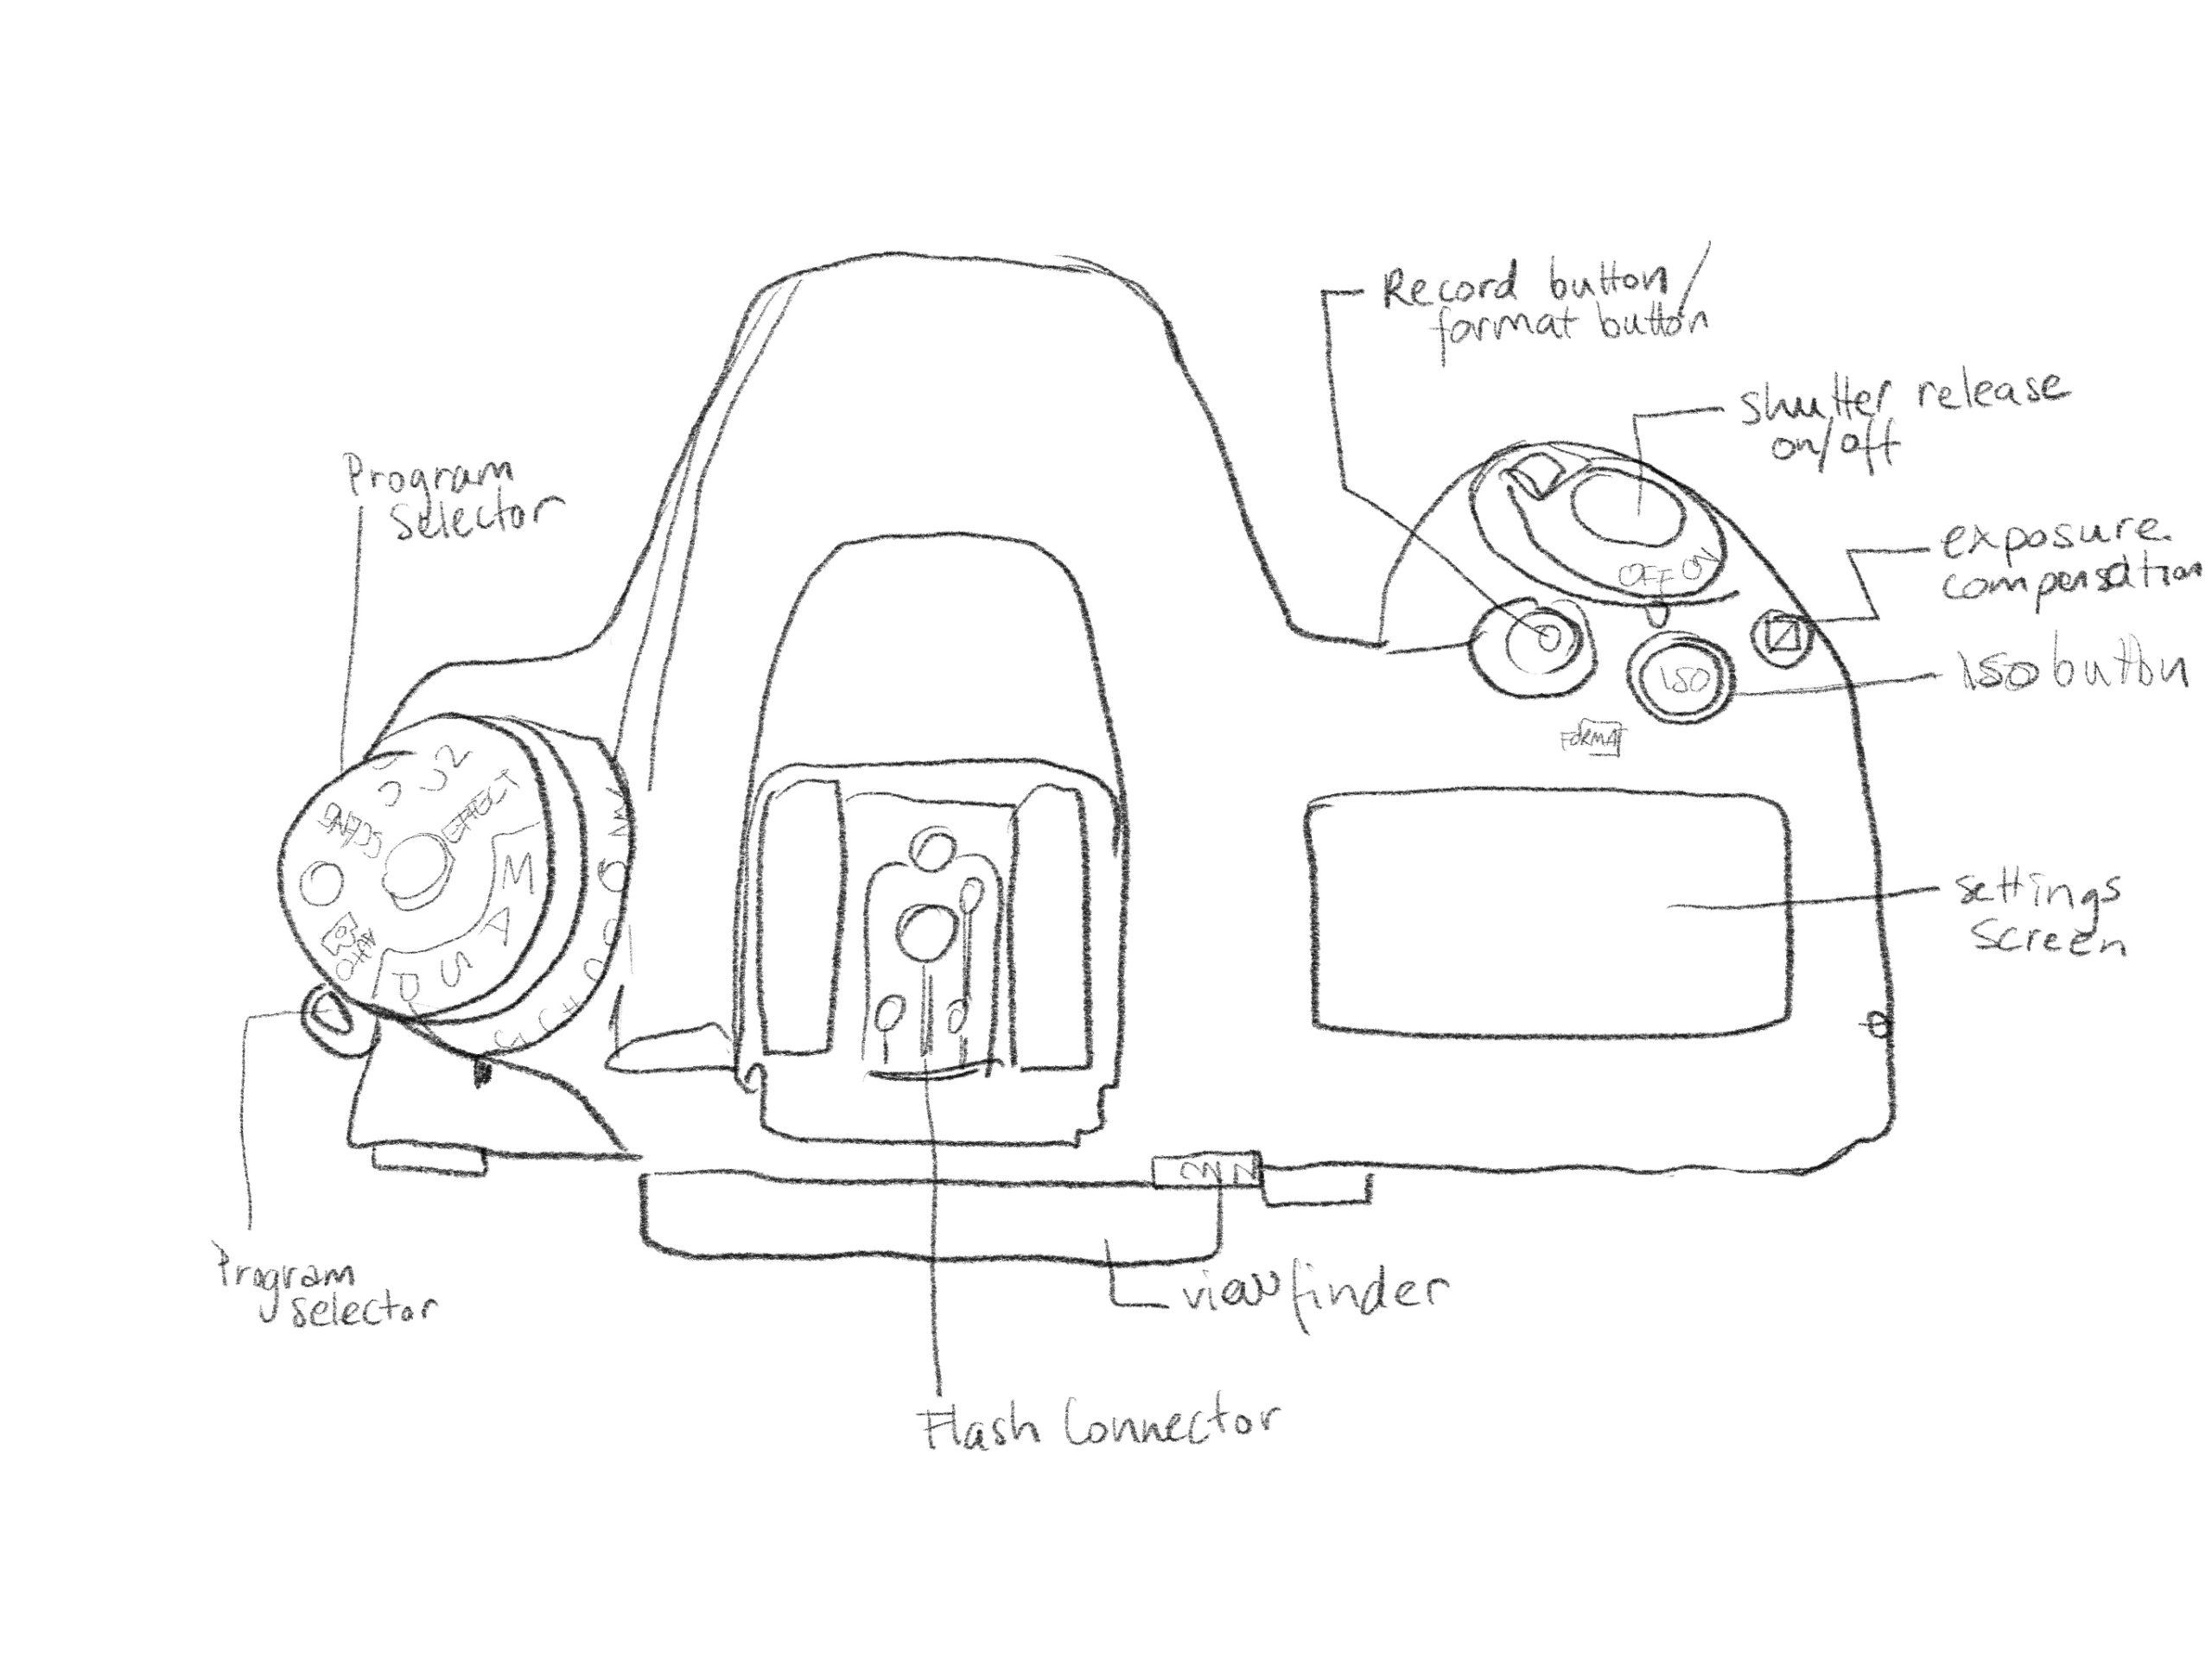
I have created these outlines of my camera and labeled all the buttons.
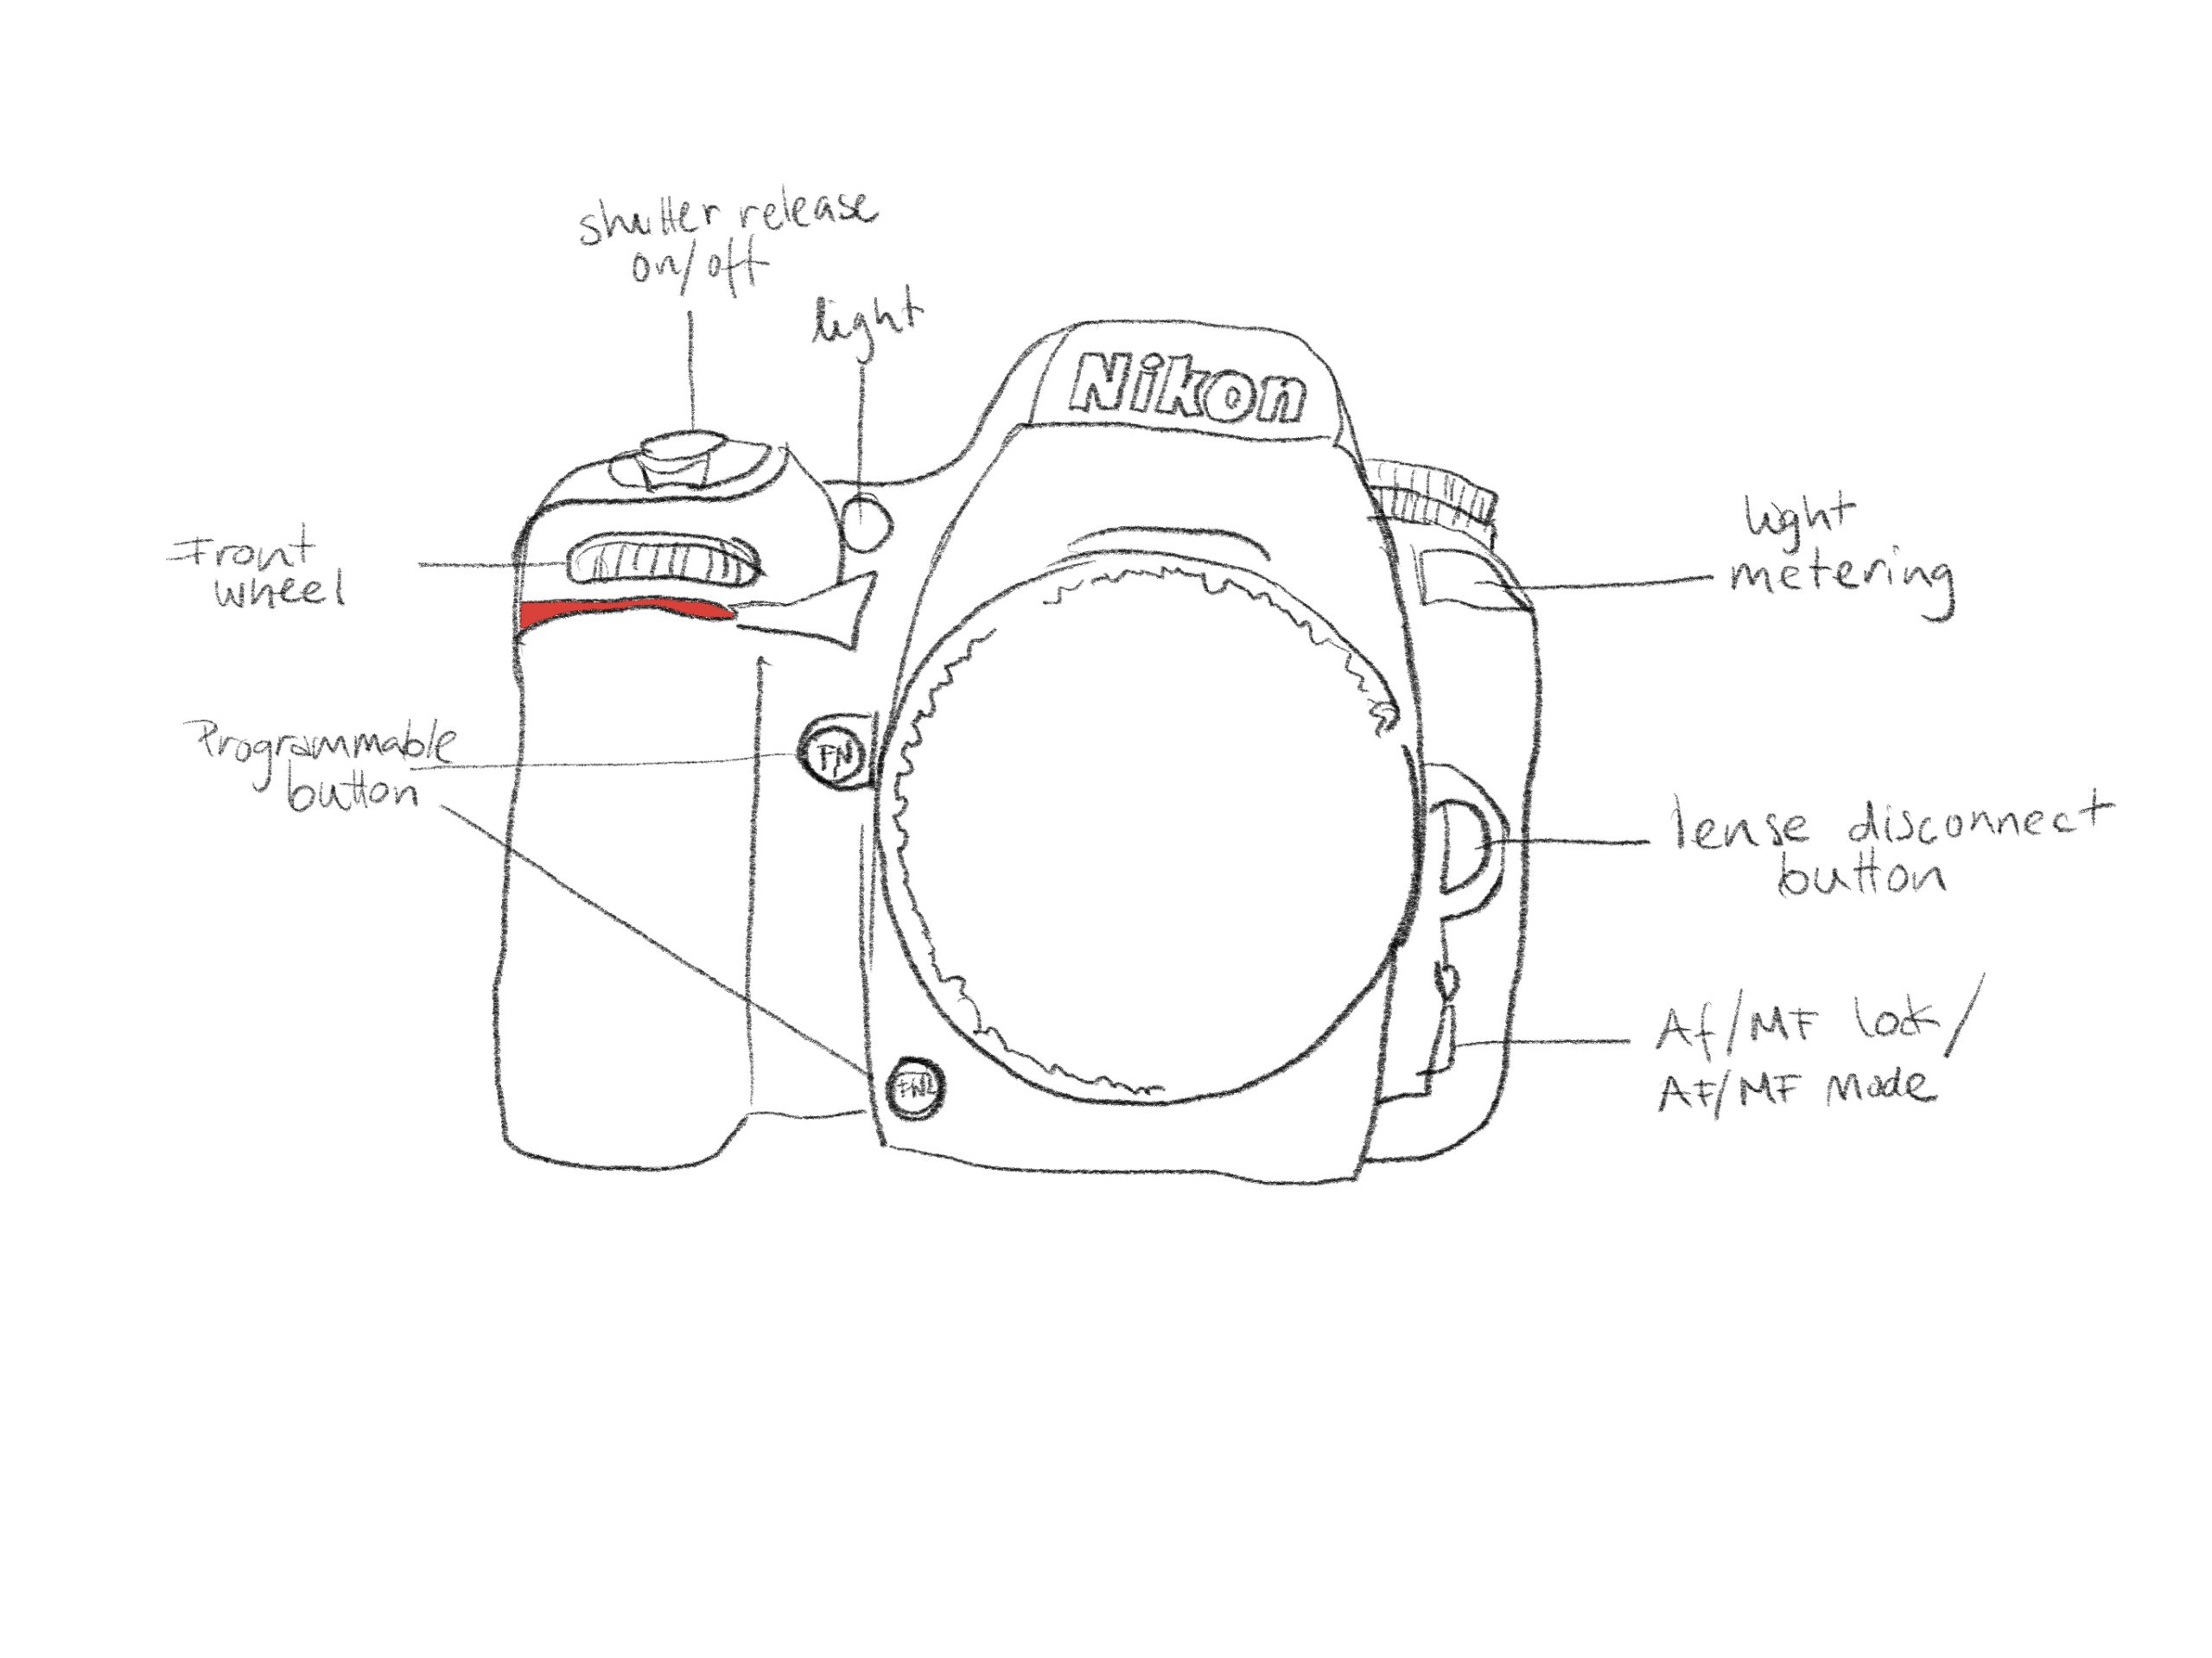
In the front, the D7500 has only a few buttons. Two of them, I use often: the button to disconnect the lense and the AF/MF mode. With the first, I can replace the lense with another depending on what I am shooting. The latter is to switch between auto focus and manual focus (button slide). With the same button I can also decide which auto focus mode I want – continuous (for moving subjects), single (for stationary objects) or auto (the camera decides). This is done by using the back dial command. By rotating the front dial command, I can choose where the focus should be taken: a single point (which I can shift around using another button), group area focused mode or a larger focus area.
D7500 has two programmable buttons, that I can assign to anything I like. I haven’t used them so far.
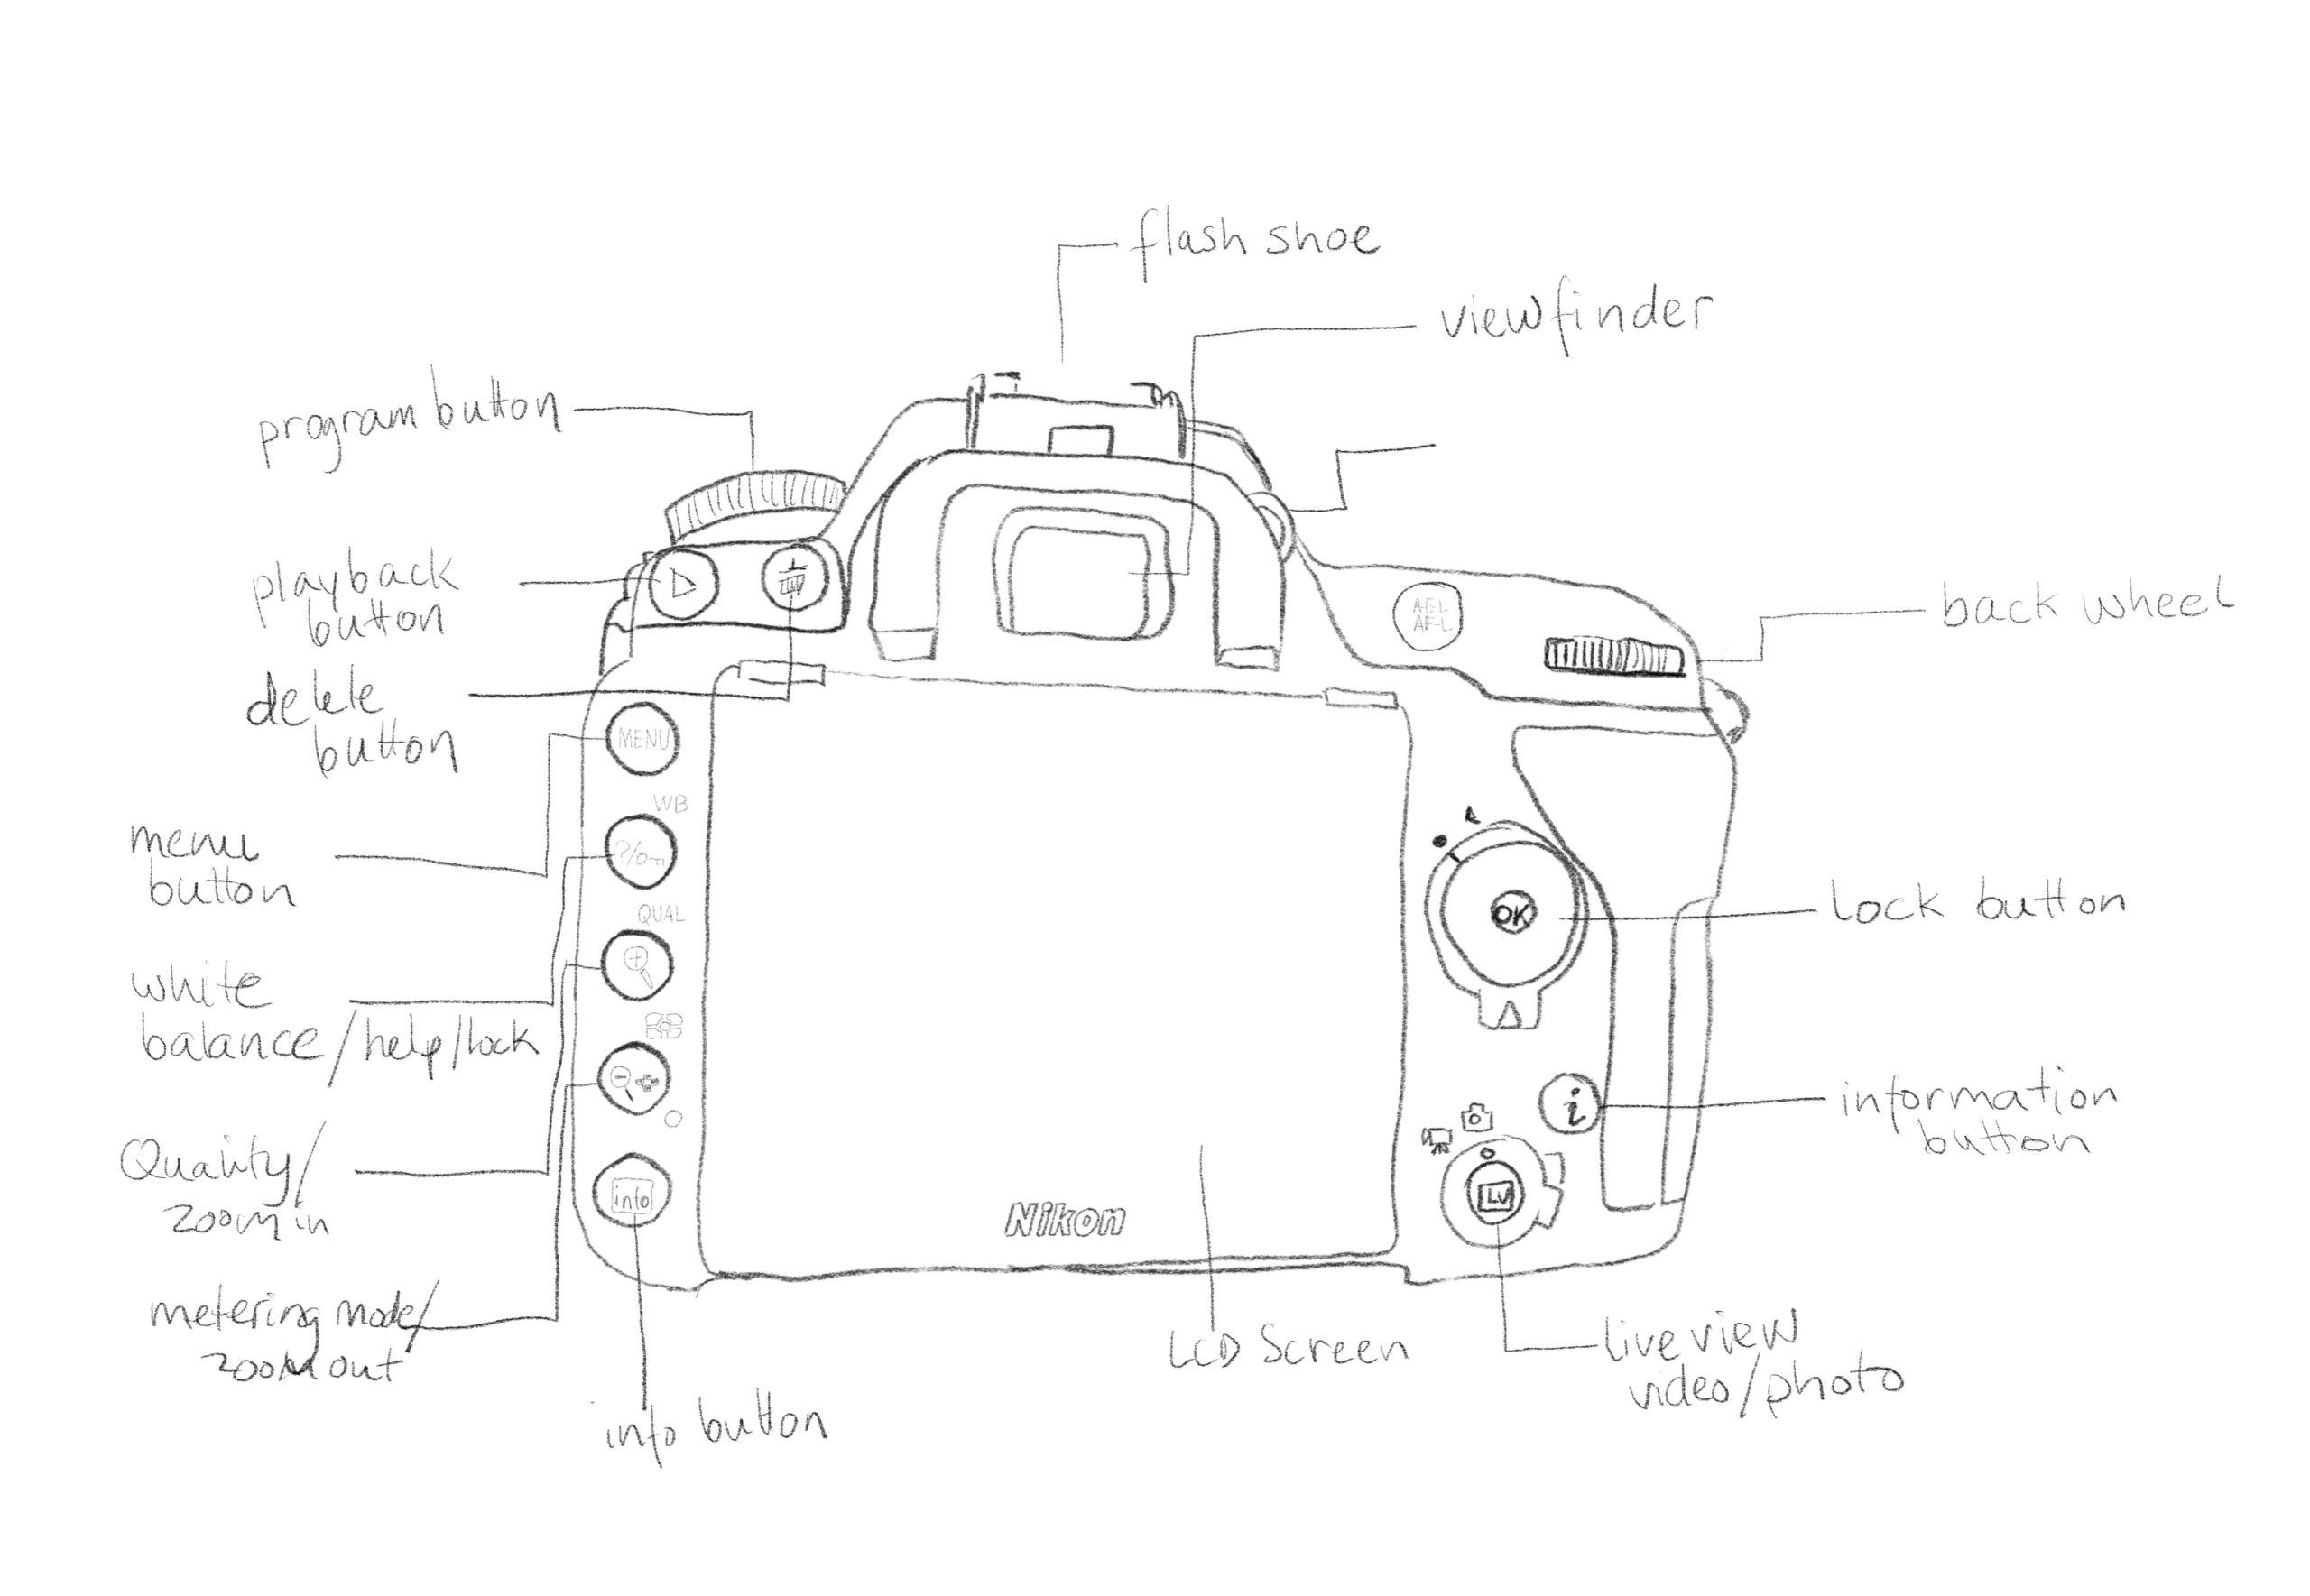
The back of a D7500 is jammed-packed with buttons. There is a button for playback and to delete files. If I combine the delete button with the record button, I can format my SD Card while it is in the camera.
The menu button is where all the settings are done. Some of the settings also have buttons – such as white balance, ISO and quality, but most settings are hidden under layers of menu options.
On the LCD screen I can read the settings when I am not shooting. I have disabled the live view when I am in photograpy mode, since this drains the batteries quickly. I use the screen mainly to check the white balance. Shutter speed, aperture and ISO I see inside the camera through the viewfinder. When I shoot video, I use the live view all the time.
I shoot my photographs mostly in manual mode, where I have to decide on shutter speed, aperature and ISO. I have tried to shoot in aperture mode, but then the ISO always go way hight, and I don’t like the results.
The technical quality of an image is determined by the exposure. Exposure is a mix of shutter speed, aperture and ISO settings. This is also called “the exposure triangle“.
The shutter speed is how long the shutters inside the lens stay open, and therefore how long the sensor inside the camera is exposed to light. Shutter speed can be used to control movement. With a long shutter speed, you can get motion blur in your images – for example, you get this blurry waters we have all seen. With a fast shutter speed, you can freeze a movement – for example an athlete in motion or a water drop in the air.
The aperture, or the f-number, determines the amount of light that reaches the sensor inside the camera. With a large aperture (low f-number), lots of light reaches the sensor, the depth of field is shallow – the same way as if your eyes are exposed to lots of light – your vision gets blurry. With a small aperture (large f-number), you have longer depth of field.
ISO is how sensitive the sensor is to light. In the old days, the silver nitrate on the film, had different light sensitivity, and the same applies to the sensors in modern digital cameras. With higher ISOs comes noise in the images. You can see this as grains. My camera has ISO ranging from 50 til Hi.2 (164 000).
The sum of these three components are always the same, so if you change one, you have to do adjustments to one or both of the others. For example, if you want to shoot with aperture 4 with a shutter speed of 125, you might need an ISO of 1600 to get a correct exposed image. If you change the aperture to 2.8 (more light into the camera), you can either adjust the ISO to a lower one, choose a higher shutter speed or a little bit of both. Which one is determined of the expression of the image you are trying to capture.
In my D7500, to set shutter speed, aperture and ISO is quite easy:
- the shutter speed is set by rolling the back command dial
- the aperture is set by rolling the front command dial
- the ISO can be set in three different ways, depending on where your are in your shooting sequence: by menu, by pressing the ISO button on the back and then front- or back command dial to set a fixed ISO or auto ISO, and the last one is by pressing the ISO button on the top while shooting and roll the back command dial